Saturday, January 7, 2017

Here’s a step by step guide on how to jailbreak iOS 10 and iOS 10.1.1 on supported devices using mach_portal + Yalu jailbreak and Cydia Impactor.
Before going ahead with this jailbreak released by Luca Todesco based on Ian Beer’s Project Zero exploit, it’s important to know the devices that are currently supported by the jailbreak, as well as the firmware versions that are compatible with it. It is also important to note that the jailbreak is beta and semi-untethered in nature, which means bugs are to be expected and you will have to put it back in jailbreak mode after every reboot.

With all that out of the way, here is what you need for jailbreaking iOS 10-10.1.1 on a supported iPhone or iPad device:
  • Supported devices and firmware: iPhone 7/7 Plus running iOS 10.1 or iOS 10.1.1, iPhone 6s/6s Plus running iOS 10.0.1-10.1.1 and iPad Pro running iOS 10.0.1-10.1.1.
  • Yalu iOS jailbreak IPA file by Luca Todesco which you can download from here: Download Yalu iOS 10.1.1 Jailbreak For iPhone 7, 6s, iPad Pro.
  • Cydia Impactor, which can be downloaded from cydiaimpactor.com.
  • A free or developer Apple ID. You can register for a free Apple ID from appleid.apple.com.
  • Latest version of iTunes.
  • A computer running either Windows or macOS.
Step 1: Connect supported iPhone or iPad to your computer using a Lightning/USB cable.
Step 2: Make a complete backup of your data using iTunes which you can return to in case anything goes wrong during or after jailbreak.
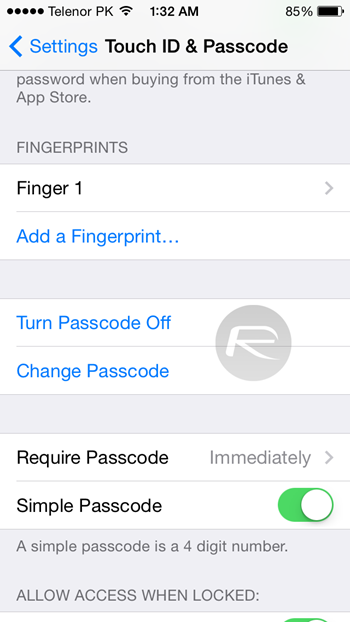
Step 3: Disable Passcode/Touch ID on your device from Settings > Touch ID & Passcode.
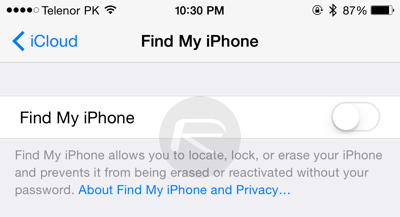
Step 4: Disable Find My iPhone on your device from Settings > iCloud > Find My iPhone.
Step 5: Launch Cydia Impactor.
Step 6: Drag and drop the Yalu IPA file on Cydia Impactor.
Step 7: Enter your Apple ID when Cydia Impactor prompts for it.
Step 8: Now wait for Cydia Impactor to install the jailbreak app onto your device.
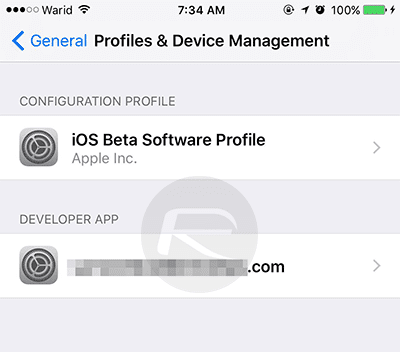
Step 9: Once installed, disconnect your device from computer and head to Settings >  General > Profile(s) & Device Management or General > Device Management and hit Trust and then Trust again on the certificate you used to install this jailbreak app.
Step 10: Now launch the “mach_portal” jailbreak app from the Home screen and wait 10 to 15 seconds for it to do its thing. It will basically show a white screen, and then close itself, after which Cydia will show up on the Home screen.
If Cydia doesn’t show up on the Home screen, reboot or hard reboot your device and it should be there.
That’s it! Your device is now jailbroken with Cydia installed.
As mentioned earlier, since this is a semi-untethered jailbreak, it means you will have to put your device in jailbreak mode after every reboot. To do this, follow the instructions here: Re-Jailbreak Mach_Portal On iOS 10 / 10.1.1 After Reboot, Here’s How.
If you used free Apple ID to install this, your jailbreak will expire after seven days, after which you will have to re-jailbreak it again from Step 5 onwards. No data, settings or tweaks will be lost during the re-jailbreak process. Those with full developer IDs though can run it without re-jailbreaking for up to a year.






Monday, June 27, 2016

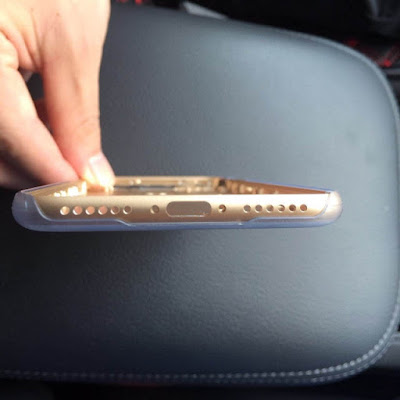
រូបភាពថ្មីមួយ ដែលគេអះអាងថា គឺជា សម្បកក្រោយ iPhone 7 ត្រូវបានបង្ហោះកាលពីពេលថ្មីៗនេះ​ ដោយវិុបសាយ nowhereelse.fr។ រូបភាព បានបង្ហាញយ៉ាងច្បាស់ថា សម្បកខាងក្រោយរបស់វា មិនមានរន្ធមូលដោតកាស 3.5 ម.ម នោះទេ ហើយត្រង់កន្លែងដោតកាសនេះ ត្រូវបាន ជំនួសដោយ ប្រហោងរន្ធឧបាល័រ មួយជួរទៀត ដូចនេះ រន្ធឧបាល័ររបស់ iPhone 7 នឹងមាន 2 ជួរ ដើម្បីទ្រទ្រង់សម្លេង ស្តេរីអូ។
nowhereelse.fr បានបន្តទៀតថា គេសង្កេតឃើញ ប្រហោងដាក់កាម៉េរា មានទំហំធំជាងមុន… ដែលត្រូវនឹងដំណឹងលេចលឺកន្លងមក ដែលថា Apple នឹងបង្កើនសមត្ថភាពថតរូប នៅលើ iPhone 7។ ចំណែក វ័នអង់តែនមួយខ្សែ ដែលរត់កាត់ផ្នែកខាងក្រោយ និងនៅខាងក្រោមកាម៉េរា មិនឃើញមានទៀតទេ ប៉ុន្តែ វ័នដែលនៅគែម ផ្នែកខាងលើតួ គឺនៅមានដដែល។
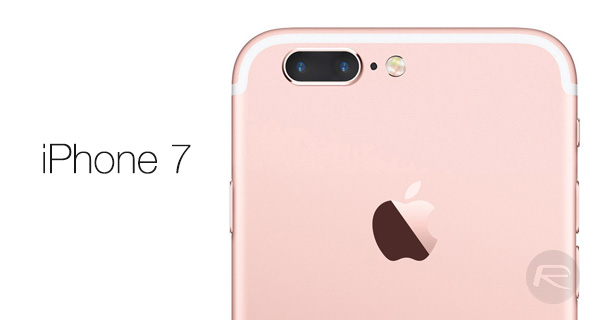
គួររំលឹកថា ក្រុមហ៊ុន Apple ត្រូវបានគេរំពឹងថា នឹងប្រកាសពី iPhone ម៉ូដែលថ្មី នាខែ កញ្ញា ចុងឆ្នាំ 2016 នេះ ហើយបើតាម ដំណឹងដែលលេចលឺ កាលពីពេលថ្មីនេះៗ iPhone ម៉ូដែលក្រោយនេះ នឹងមាន 3 ប្រភេទគឺ: iPhone 7, 7 Plus និង 7 Pro៕

Monday, May 23, 2016

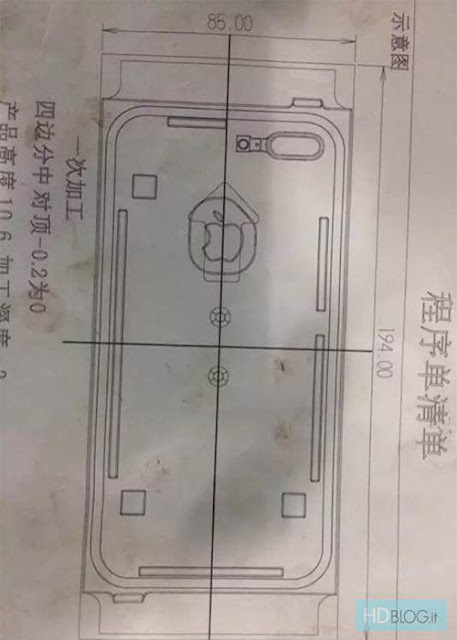
Another day, another iPhone 7 rumor, or at least another leak. Hot on the heels of a similar leak that claimed to show the dual-lens camera module from an iPhone 7 Plus, this new leak contains photos of schematics for what is claimed to be the iPhone 7 and iPhone 7 Plus.
Discovered on Baidu by HDBlog, these schematics, or rather, their molds, are shown side-by-side as if to illustrate that one is the standard iPhone 7 while the other is the larger iPhone 7 Plus. While that’s all well and good, what it really shows us is that the rumored dual-camera designexpected to be part of Apple’s iPhone announcement this year will likely only be on the larger Plus model. As the schematics show, the extra lens is only depicted on the iPhone 7 Plus, meaning those choosing the smaller model will have to make do with just the one camera.

While cameras are great, some new technology said to be making its way to the iPhone 7 may also be unlikely to make an appearance, with the rumored Smart Connector nowhere to be seen on either the larger or smaller schematics.

Previously, rumors had suggested that the iPhone 7 Plus alone would feature the new Smart Connector technology that first debuted with the iPad Pro, but now it appears that neither model will, assuming these schematics are legitimate, of course.

As rumors start to mount up, the recent camera leak also had Apple launching a 256GB iPhone for the first time this September. Again it’s unclear whether this would be something just for the iPhone 7 Plus or the smaller iPhone 7. What we do know is that we are edging closer to the point where the rumors won’t be needed anymore because Tim Cook will be on-stage in September.
We cannot wait.

(Source: HDBlog [Google Translate])

iOS 9.3.3 Has Already Been Jailbroken

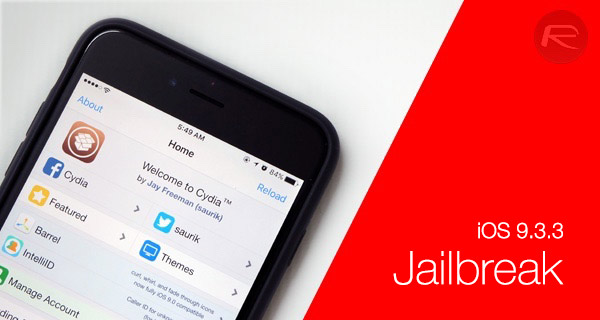
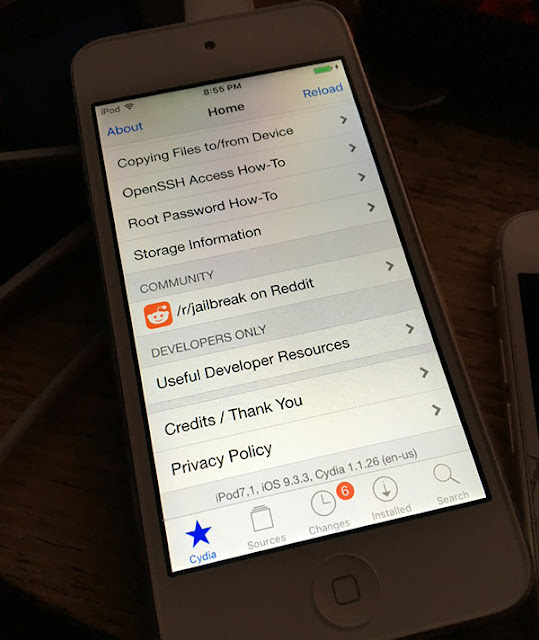
Apple only released iOS 9.3.3 in its initial beta form a few hours ago, but already, the new release has been jailbroken by developer Luca Tedesco as indicated by a photo that he posted a little while ago.
Taking to Twitter to show off the jailbreak, Luca posted a photo of an iPod touch running the Cydia jailbreak store while also displaying the current version of iOS that, obviously, is iOS 9.3.3.


Luca has previously spoken about possessing a jailbreak for iOS 9.3, and has even demoed it on video, but has not released it to the public, and neither does he plan to. As of this moment, there is no way to jailbreak any version of iOS from iOS 9.2 and beyond, which makes this photo and Luca’s past claims particularly interesting to those who jailbreak.

Currently, anyone wishing to jailbreak can only do so as long as their hardware is running iOS 9.1 or earlier, which brings with it its own issues of instability and missing features. Keeping up with iOS releases is vital, but if you want to stay jailbroken, that is not always an option.
There is a respectable stack of new features on offer in the latest major update from Apple, though. The features aren’t the only reason you might want to consider updating, as iOS 9.3 and its followup releases bring with them bug fixes alongside numerous speed and security improvements.


At this point, just like his iOS 9.3 jailbreak, it is not expected that Luca will make this iOS 9.3.3 beta jailbreak available to the public given his recent past and refusal to release a jailbreak that is so sorely wanted by many. We’re sure that Luca has his reasons for not wanting to either cash in or simply release the jailbreak for free to the public, but whatever those reasons, we doubt the jailbreak fanatics will agree with him, at least not en masse. But it is still good to know that iOS 9.3.3 is vulnerable and can be jailbroken.
The end result is still the same – if you’re going to jailbreak, make sure you don’t upgrade beyond iOS 9.1, let alone the freshest beta release available from the Apple Developer portal.

Tuesday, April 5, 2016


Your Mac, iPhone, iPad, Apple Watch, and/or any other other fancy high-tech devices you have are fun to use, but they’ll easily get dirty and collect dust, sneeze splatter, and bacteria from your fingers over time, whether they’re used frequently or not.
To combat grime, you can clean your devices every so often, but like anything else, there’s a right and a wrong way to do this.
In this piece, we’ll share with you some handy tips for cleaning your Apple devices safely so you don’t accidentally damage them.

The gross realities of every day device usage

As you use your Mac, you’re constantly breathing, sneezing, coughing, talking, and doing other things. As you do, moisture and particles from your body will spatter onto the display and other parts of the computer. If you turn your screen off, you might see little round dots that appear to be dried fluid.
Also, as you use your keyboard and trackpad, or even your touch screen on your mobile or wearable devices, you’re spreading the bacteria that you touch throughout the day to your machine and its input devices. You also smear face bacteria and oils all over your iPhone as you talk on the phone, and your arm sweat rubs on your Apple Watch.
If you let anyone else use your Mac or mobile devices, their germs are just going to spread on to you from your keyboard, track pad, and touch screens.
Yeah… doesn’t sound too appetizing, does it?
You should be cleaning your devices every so often not only so they look spick and span, but also to prevent unwanted spread of bacteria and germs from infecting you.

Cleaning your Apple devices 101

Although the guidelines for the right and wrong way to clean a device are mostly common sense, I see people wrongly cleaning their devices all the time and it makes me cringe. Here are some of the tips you should be following:
Avoid wet stuff
This is one of the things I see people failing to do all the time. It seems like I always witness people carelessly spraying Windex, rubbing alcohol, and other solvents onto their screens and devices to clean them up of bacteria and other forms of germs.
The fact of the matter is, these chemicals are very harmful to your device. They can break down the oleophobic coating on your touch screen, which helps resist fingerprints, and they can also ruin the anti-glare coating on your Mac. Reaching further than the displays, the fluids can penetrate the device’s open ports and slots, potentially causing water damage to your circuitry and device internals.
In almost every circumstance you should avoid using any liquids near the product, unless it’s completely unavoidable. If you do have to use fluids, you should spray the cloth you’re using to wipe the device, and not the device itself. This will help prevent fluids from running along the cracks and crevices of your device and working their way into the hardware.
Moreover, plain water is typically good enough for the cleaning job. There’s no need to introduce potentially harmful chemicals to the surface of your expensive equipment.
Use safe cloths only
Believe it or not, not all cloths are the same. There are microfiber cloths, lint-free cloths, towels, paper towels, bathroom tissue, and many other kinds of wiping materials people will try to use to clean their devices.
You should avoid anything that’s going to come apart on the device while you’re cleaning it. For this reason, you should avoid using towels filled with lint, such as ones you’ve used previously for dusting, and you should avoid paper towels and bathroom tissue because they can tear and pieces of it can become lodged in your device (especially if wet).
Apple recommends a lint-free cloth, and microfiber cloths made for cleaning screens, such as these cloths on Amazon for $9, work great for cleaning your Mac or iPhone’s screen. If you’ve ever bought a high-end screen protector or case before, then you probably already have some of these laying around and won’t need to buy more.
Never use anything abrasive, which would have a sandpaper-like surface to it, as it will ruin your screen or aluminum finish.
Unplug cables and external devices
When cleaning your device, whether it’s a Mac or an iOS device, you should disconnect all peripherals before you begin the cleaning process.
This not only helps prevent you from accidentally knocking things over when you lift your Mac up from its desk, but it also prevents wires with electrical power running through them from causing any kinds of electrical shorts, which would ruin the device.
In addition to unplugging cables, I’d go a step further and power the device down so that when you use any kind of moist lint-free cloth, you do so in a fashion that will be the most safe. Nothing good ever comes from getting electronics wet, but you reduce chances of damage when the device is powered down.

Wrapping up

Fortunately, many of Apple’s modern mobile devices, like the iPhone 6s/6s Plus and the Apple Watch are water resistant, but Apple’s Mac lineup and many older iOS devices do not have such a luxury. As a result, it’s a good rule of thumb to simply avoid using any kind of liquids. Just be careful in the selection of the towel you use for wiping, and make sure to take precautions to protect your machine before you start cleaning it and everything should go fine.

Thursday, October 1, 2015


Some very interesting changes in how Windows is installed in Boot Camp on OS X 10.11 “El Capitan”.  When you open Boot Camp Assistant on a new Mac that supports Windows 8 or later, you’ll get the new Boot Camp interface.


Notice the ISO image and partitioning are all on a single screen.  Prior to El Capitan, you had to insert a USB Flash Drive and Boot Camp Assistant copied the Windows installer from an ISO disk image to the flash drive, and then downloaded and set up the Windows drivers to the correct location in the installer for the Mac hardware.  El Capitan makes this a lot simpler.  Just select the ISO and how much space you want from Boot Camp, and then you click Install.

After Boot Camp Assistantd completes, OS X restarts to the Windows installer, and you follow the normal Windows installation.

Behind the Scenes

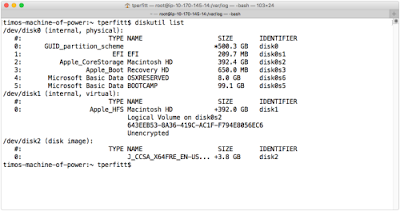
So how is this possible?  Where is the Windows installer if there is no installation media?  Boot Camp Assistant doesn’t just create a Boot Camp partition, but also creates an additional partition called “OSXRESERVED” that is FAT32 formatted.  It places this partition right after the recovery partition, and before the Boot Camp partition, as shown below.
The command line make this really clear.  Partition 1 is the standard EFI partition, partition 2 is the Mac partition, partition 3 is the Recovery partition.  All standard stuff.  Partition 4 is now the OSXRESERVED partition, and partition 5 is the BOOTCAMP partition.  You’ll also notice that disk2 is the Windows install ISO disk image that the Windows install files are copied from.

The OSXRESERVED partition has all the installer files, the Boot Camp drivers for Windows, and the EFI files for booting.


If you are familiar with EFI booting on OS X, you’ll see a familiar setup.  The EFI folder on the OSXRESERVED partition is the same one you would normally find on the EFI partition (normally disk0s1).  It appears that newer Macs have the ability to detect this partition and present it to Windows as if it were EFI installation media (such as a DVD or USB Flash drive).
So what happens to this partition after you are done installing?  During the next boot into OS X, the OSXRESERVED partition is removed and put back into the Core Storage container of the OS X partition:

Note that the Device is disk0s5 since the other partition existed on startup, but then it was deleted.  On next reboot, this device will change back to disk0s4, which is the standard device location for a Boot Camp partition.
This setup is not supported on all Macs that run El Capitan.  Only hardware that has newer firmware supports this.  We did a survey of all the shipping Macs, and here are the ones that support this new slicker setup:

Supported:

  • Mac Pro
  • MacBook Air 13‑inch
  • MacBook Air 11‑inch
  • MacBook Pro 13‑inch
  • MacBook Pro 15‑inch

Older USB Installation

  • iMac 21.5″
  • iMac 27″
  • MacBook Pro 13‑inch
  • USB-C MacBook (surprising)
El Capitan’s Boot Camp-related updates are not just limited to Boot Camp Assistant.  There are also changes in how Boot Camp is affected by the new System Integrity Protection (SIP).  Tune in tomorrow for the next segment.
(Source: Twocanoes)


Saturday, February 7, 2015

Tip: How to save photo from instagram

Looking to save some of the precious moments you find on Instagram? If so, thenSaveGram is a jailbreak tweak that you want to try today. It allows you to not only save photos from the people you follow, but also videos as well.

After installing SaveGram, it just works, and there are no settings to configure. In fact, no preference panel exists in the Settings app for the tweak, and no app icons are placed on the Home screen.
SaveGram is wholly contained within the Instagram app, and looks totally like a native feature. Once you’re viewing a photo or a video that you wish to save, simply tap the ellipsis button in the bottom right-hand corner of the photo page, and tap the new Save button and the bottom of the list. This will save the photo or video directly to the iOS Photos app.

You’d be hard-pressed to find a simpler and more native method for saving IG photos. If you want to check out SaveGram, you can do so free of charge from the BigBoss repo on Cydia.


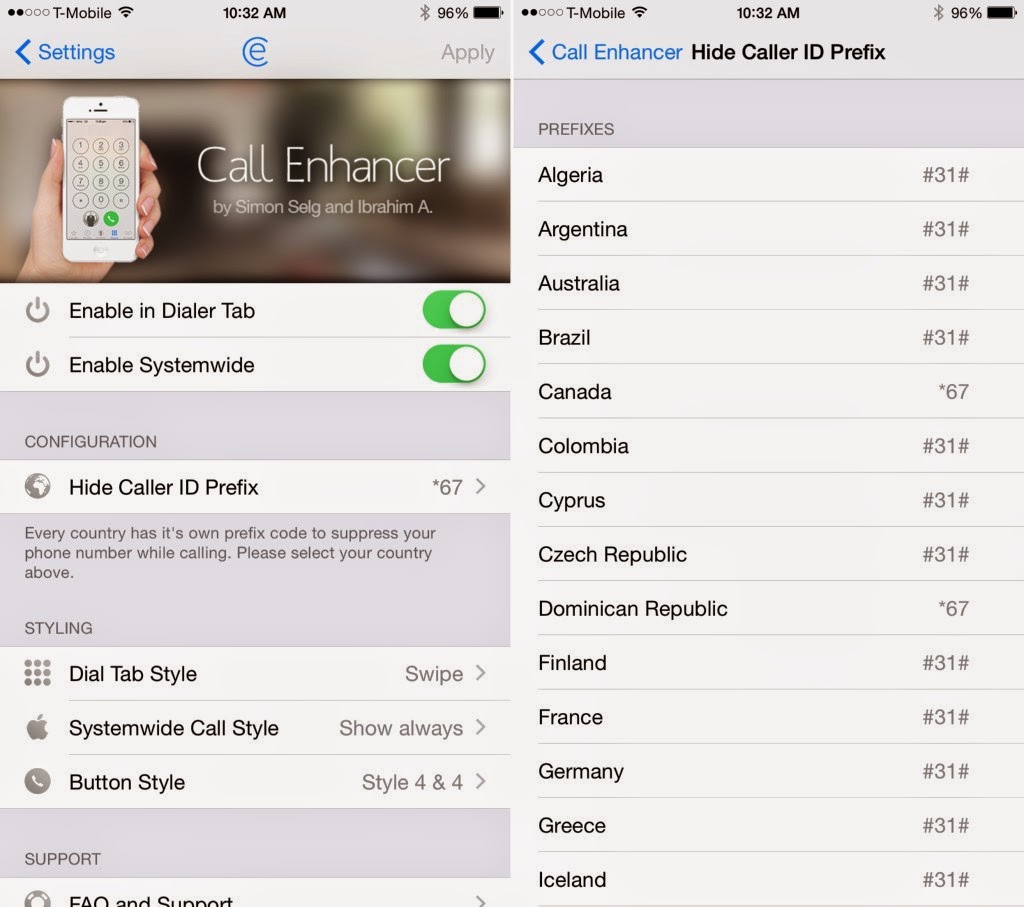
Making anonymous phone calls that lack Caller ID credentials has always been possible. In fact, many countries have their own specific prefix codes in order to block your phone number from being displayed on a recipient’s Caller ID. For the US, that code is *67, but in iOS, there is no easy way to add the prefix to a contact that you wish to call. Call Enhancer is a jailbreak tweak that makes anonymous calling much easier on iOS, and it brings with it one additional key benefit.


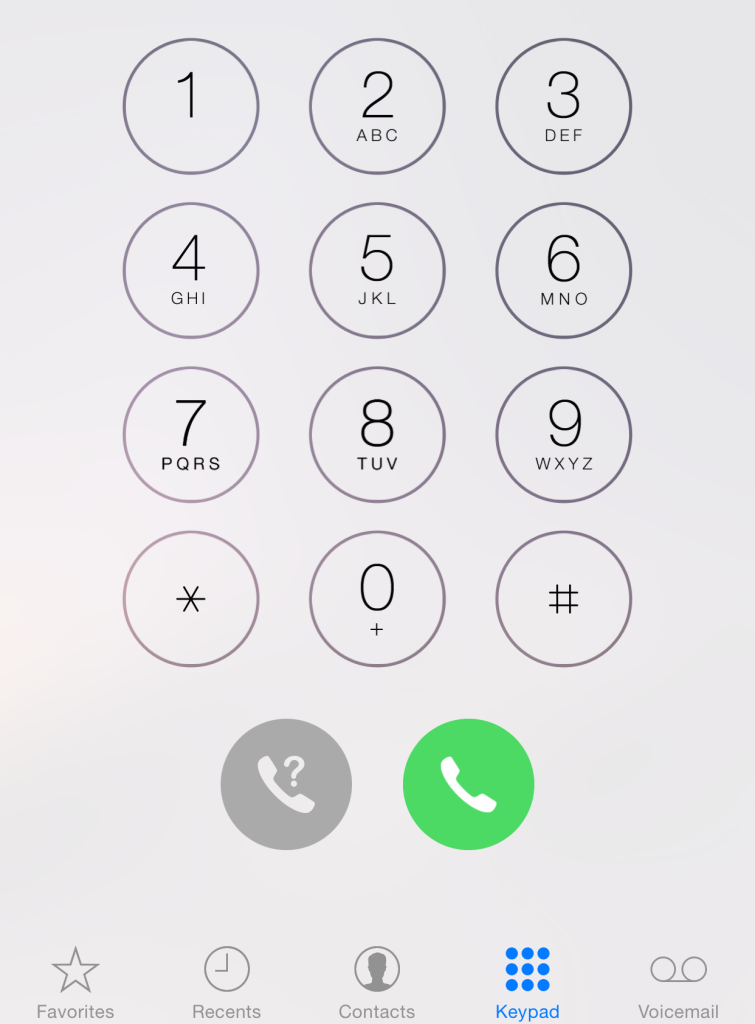
This additional benefit is a new interface that prompts whether or not you want to make a phone call upon tapping a contact. I can’t tell you how many times I’ve accidentally called someone from my contacts due to an inadvertent tap. Call Enhancer provides you with the opportunity to confirm your intentions before the call is initialized. Some may not like this functionality, believing that it slows down their workflow, but if you find yourself subjected to a lot of unintentional phone calls, then I recommend giving this a try.
From the confirmation interface you can choose to complete the call as normal, or you can complete the call anonymously. Anonymous phone calls are simply prepended with the Caller ID blocking code for your country. You can also choose to cancel the phone call by using the ‘x’ button residing beneath the two phone call buttons.
Venture over to the stock Settings app once Call Enhancer is installed, and open the tweak’s preferences. There, you’ll find a nicely designed preference panel, with several options geared towards configuring the tweak to your liking. You can enable Call Enhancer from the Keypad interface, or system wide. You can also choose your Caller ID prefix based on the country you reside in.

There are several styling features that can be customized by means of Call Enhancer’s preferences. There’s the Dial Tab style, which allows you to swipe on the green phone call button to reveal the anonymous button option. You can also choose to tap and hold to reveal the anonymous button, or always display the button.
Next, you’ll find the system-wide style, which is the confirmation interface that ensures that you actually want to complete a call upon tapping a contact. This setting defaults to “show always” which I recommend keeping that way.

Lastly, you’ll find the button style, which lets you customize the look of the anonymous button option within both the keypad dialer and the systemwide dialing interface. There are four button style to choose from, with some style being more discrete in appearance than others.
I really like Call Enhancer, because it brings functionality to the table that I’m able to derive real-world benefits from. I can’t stress how many times I’ve accidentally dialed a number, and I’ve always wanted to be able to block my Caller ID on the fly. With the way I use the Phone app, Call Enhancer makes the Phone app better.
What do you think about the feature set brought forth via Call Enhancer? Would you consider using it?

Saturday, January 24, 2015

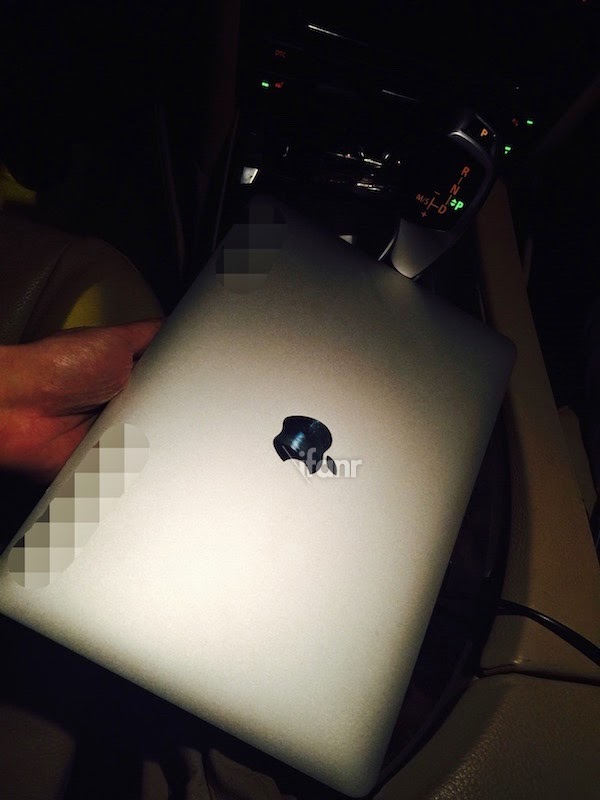
As soon as Chinese website iFanr posted a bunch of photos last night showing what appears to be a display assembly for Apple’s rumored twelve-inch Retina MacBook Air, one particular design feature immediately stood out: a polished logo on the lid.
And if the latest leak published by French blog NowhereElse.fr is anything to go by, it seems that Apple’s radically redesigned notebook will in fact lose its traditional backlit translucent logo on the lid in favor of a metallic one that doesn’t glow.
A source who obtained the part back in late December told NowhereElse that it was designed for a brand new product. The publication clears up any possible confusion by stating that iPhone 6 logos are sent to the assembly lines in batches of six units, not four like you see on the top image.

NowhereElse sat on this info for weeks until iFanr’s claimed photos of the notebook’s display assembly came along, clearly showing a polished rather than the traditional translucent Apple logo on the lid (see below).
To make its point, NowhereElse scaled up the original iPhone 6 logo seen on the far right on the above photo. You can clearly see for yourself that the resulting surrounding area is much larger than that of its iPhone 6 counterpart.
For what it’s worth, DigiTimes, a hit-and-miss Taiwanese trade publication, alleged that Apple is about to switch to laser cutting and advanced embedding technologies. The new process technology is supposed to make the logo on the company’s upcoming products “3D-like and shine at the edges”.
Source: NowhereElse.fr 

Thursday, December 4, 2014

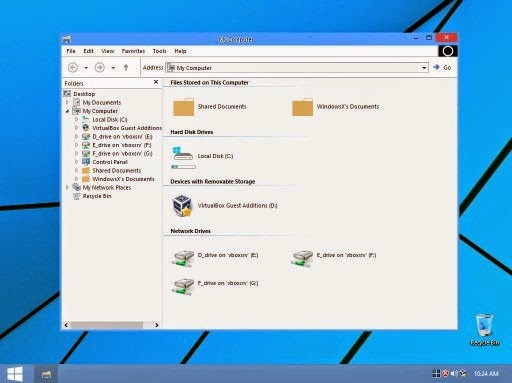
Windows 10 is all the rage these days. For those who are excited about Windows 10′s aesthetics, a Windows 10 Transformation UX Theme Pack has been released and shall dress your Windows XP, Vista, 7, 8, and 8.1 in all the makeup required to walk the Windows 10 ramp.
There are a number of Windows 10 transformation packs out there but ‘UX’ pack is this package’s ability to make changes to your Windows installation without patching the system files, making the transformation pack less likely to cause system issues.
 This new Windows 10 Transformation/UX Pack carry the same installation procedure be it on Windows XP or Windows 8.1. As with most transformation packs, this one takes you through the setup allowing you to choose the customizations you want made to your existing Windows, but if that confuses you, you can always go the default way, which should be fine for most novice users.
 The setup integrates new themes, wallpapers, icons, fonts, sounds etc. along with various third party tools to emulate certain looks and functions of Windows 10, such as the new Start Menu. You might think that it’s the same that is to be found on previous version of Windows, but in reality it is the new Windows 10 Start Menu with tiles which gives Windows 8 and 8.1 users a good chance to experience the new look and feel of the OS without actually installing it.
 No transformation pack would be complete till it offered a comprehensive ability to allow the user to roll back to the original settings, and this one is no different. It features a complete uninstall option to take you back to the previous state.
 Windows 10 is currently available as a Technical Preview build for testing purposes only. If downloading and installing the Technical Preview is too much of a work for you, you can take the easier approach by downloading the transformation pack from here, something that you can easily remove later.